Simple CI/CD for Python apps using GitHub Actions

In this post I share how I built a simple CI/CD pipeline powered by GitHub Actions to build, test and deploy a Python application to DigitalOcean, but it can be applied to any server with SSH.

CI/CD with GitHub Actions

Because I hate long blog posts with the vital information right in the middle, I’m going to share my .yml file and let you decide whether you need to read the rest of the post, or not. Sometimes the source code is enough.

name: Deploy to production
on:
  push:
    branches: [ production ]

jobs:
  deploy:
    name: Deploy to production
    runs-on: ubuntu-latest
    steps:
      - uses: actions/checkout@v2.1.0
      - name: Set up Python 3
        uses: actions/setup-python@v2
        with:
          python-version: '3.x'
      - name: Install dependencies
        run: |
          python -m pip install --upgrade pip
          pip install -r requirements.txt
      - name: Prepare database
        run: |
          cd ./db
          tar -zxvf appdb.tar.gz
      - name: Run end-to-end tests
        run: pytest
      - name: Build app
        run: python setup.py sdist
      - name: Deploy build to production
        run: |
          mkdir $PWD/.ssh
          eval "$(ssh-agent -s)"
          echo -n "${{ secrets.SSH_KEY }}" > $PWD/.ssh/id_rsa
          chmod 600 $PWD/.ssh/id_rsa
          ssh-add -k $PWD/.ssh/id_rsa
          ssh-keyscan -t ecdsa-sha2-nistp256 ${{ secrets.PROD_SERVER }} > $PWD/.ssh/known_hosts
          ssh -o UserKnownHostsFile=$PWD/.ssh/known_hosts ${{ secrets.USER }}@${{ secrets.PROD_SERVER }} "
            cd /home/app;
            source envapp/bin/activate;
            pip install app-1.tar.gz --upgrade;
            touch wsgi.py;
            sudo nginx -s reload;
          "
          rm $PWD/.ssh/id_rsa $PWD/.ssh/known_hosts
      - name: Clear Sucuri's cache (WAF)
        run: |
          curl "https://waf.sucuri.net/api?v2" \
            --data "k=${{ secrets.SUCURI_KEY }}" \
            --data "s=${{ secrets.SUCURI_SITE_HASH }}" \
            --data "a=clear_cache"

Defining the GitHub Actions

Chances are you already know this, but in case you do not, GitHub gives you 2000 minutes per month to run GitHub Actions. And these actions can be whatever you program them to be. You can use them to build your project, run tests against it, and to deploy it. The sky’s the limit.

You can make use of GitHub Actions by creating a .github directory at the root of your project, creating a workflows directory inside it and describing your actions using .yaml/.yml files.

Let’s create a cicd.yml file inside .github/workflows. The simples of actions looks like this:

name: Deploy to production
on:
  push:
    branches: [ production ]

jobs:
  deploy:
    name: Deploy to production
    runs-on: ubuntu-latest
    steps:
      - uses: actions/checkout@v2.1.0
      - name: Run ls command
        run: ls

This action simply pulls the current repository in an Ubuntu container and executes the command “ls” in the current directory.

Using third-party GitHub Actions

Besides defining your own GitHub actions you also have the option to re-use actions defined by a third-party. In this case I’m using actions/setup-python@v2, which gives me a Python 2 and 3 without any of the effort.

You can check that your Python environment works OK by committing and pushing the following changes to the cicd.yml file.

name: Deploy to production
on:
  push:
    branches: [ production ]

jobs:
  deploy:
    name: Deploy to production
    runs-on: ubuntu-latest
    steps:
      - uses: actions/checkout@v2.1.0
      - name: Set up Python 3
        uses: actions/setup-python@v2
        with:
          python-version: '3.x'
        run: python --version

Defining the steps for the CI/CD or workflow

GitHub actions take steps and execute them in order to complete the workflow.

In my case I have a Python application built on top of Flask and SQLite3, and currently running on DigitalOcean.

I needed a CI/CD to:

  1. Prepare the Python environment
  2. Install Python dependencies
  3. Prepare the database (the .sqlite3 file is compressed, I need to make it ready for the step 4)
  4. Run end-to-end tests (I need the production database for the tests)
  5. Build the app
  6. Deploy build to production
  7. Clear Sucuri’s cache (CDN/WAF)

This is how the first step “install Python dependencies” is going to look like in our cicd.yml file:

- name: Install dependencies
  run: |
    python -m pip install --upgrade pip
    pip install -r requirements.txt

I won’t explain the steps “prepare database” and “run end-to-end tests” since those are only needed for my application.

The “build app” step is just running “python setup.py sdist” to create the distribution file.

The interesting part comes in the “deploy build to production” step.

SSH to your server using GitHub Actions

While there are awesome third-party actions to connect the server handling your actions to your host, my needs were really simple and I didn’t feel like I needed them. I went for something more crafty.

First things first, I defined the following secrets in my GitHub repository:

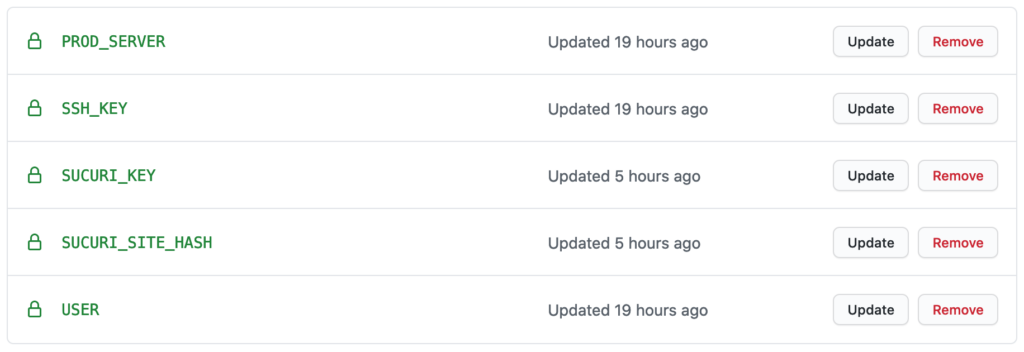
These secrets are available in your cicd.yml file as variables. You can access them with the syntax: ${{ secrets.SECRET_NAME }}

Here’s how I managed to authenticate the SSH connection from GitHub’s server to my DigitalOcean server:

mkdir $PWD/.ssh
eval "$(ssh-agent -s)"
echo -n "${{ secrets.SSH_KEY }}" > $PWD/.ssh/id_rsa
chmod 600 $PWD/.ssh/id_rsa
ssh-add -k $PWD/.ssh/id_rsa
ssh-keyscan -t ecdsa-sha2-nistp256 ${{ secrets.PROD_SERVER }} > $PWD/.ssh/known_hosts
ssh -o UserKnownHostsFile=$PWD/.ssh/known_hosts ${{ secrets.USER }}@${{ secrets.PROD_SERVER }} "
  cd /home/app;
  source envapp/bin/activate;
  pip install app-1.tar.gz --upgrade;
  touch wsgi.py;
  sudo nginx -s reload;
"
rm $PWD/.ssh/id_rsa $PWD/.ssh/known_hosts

Please note that the type of the key I’m using for ssh-keyscan (ecdsa-sha2-nistp256) might not be what you need. Please read this page for more information.

Clearing my CDN/WAF cache

On successful deployments, I also need my CI/CD pipeline to clear the cache hosted on the CDN/WAF powered by Sucuri Security.

Doing so will ensure that my app users get to enjoy new features and content as soon as they are properly tested and deployed on the production server.

Doing this with GitHub Actions and Sucuri is really easy, all it takes is a curl call:

curl "https://waf.sucuri.net/api?v2" \
  --data "k=${{ secrets.SUCURI_KEY }}" \
  --data "s=${{ secrets.SUCURI_SITE_HASH }}" \
  --data "a=clear_cache"

And that completes my CI/CD pipeline powered by GitHub actions. More advanced needs will need a more advanced pipeline, but this one fits perfectly for my project. The whole pipeline runs in less than a minute.

If you have suggestions on how to improve this pipeline, ping me on Twitter.

Happy deploying to production! šŸš€

How to publish/update a WordPress plugin

This post is intended to document the steps to publish or update a WordPress plugin for developers who have never done it before. WordPress has a nice and more complete guide on how to use Subversion if you want to learn more after reading this intro.

To create this post I also created a WordPress plugin called Honking Goose. Check it out, it’s ridiculous! šŸ’™

Checking out the repository

Once WordPress tests and accepts your plugin, you can checkout the empty svn repository at the URL they send you by email. In my case:

svn co http://plugins.svn.wordpress.org/honking-goose/ honking-goose

You will get something like this:

āžœ  svn svn co http://plugins.svn.wordpress.org/honking-goose/ honking-goose
A    honking-goose/assets
A    honking-goose/branches
A    honking-goose/tags
A    honking-goose/trunk
Checked out revision 2183506.

If you ls on the plugin directory you will see the new folders created:

assets   branches tags     trunk

Making svn ignore the .git directory

My ideal plugin workflow is to have the git repository in the trunk folder. In this way, I can work on branches on git, and when I am done and sure that my code works, I can merge everything to master and commit the changes to svn.

// Cloning master to trunk
āžœ  trunk git clone https://github.com/imgerson/honking-goose.git .
Cloning into '.'...
remote: Enumerating objects: 9, done.
remote: Counting objects: 100% (9/9), done.
remote: Compressing objects: 100% (8/8), done.
remote: Total 9 (delta 0), reused 6 (delta 0), pack-reused 0
Unpacking objects: 100% (9/9), done.

āžœ  honking-goose cd ..

// Seeing what's new
āžœ  honking-goose svn st
?       trunk/.git
?       trunk/LICENSE
?       trunk/goose.mp3
?       trunk/honking-goose.js
?       trunk/honking-goose.php
?       trunk/readme.txt

The only problem with this approach is that svn shows the .git subdirectory as untracked too. Here’s what I did to make svn ignore the .git folder:

// Telling svn to ignore the '.git' directory inside trunk
āžœ  honking-goose svn propset svn:ignore '.git' trunk
property 'svn:ignore' set on 'trunk'

// Verifying everything is good
āžœ  honking-goose svn st
 M      trunk
?       trunk/LICENSE
?       trunk/goose.mp3
?       trunk/honking-goose.js
?       trunk/honking-goose.php
?       trunk/readme.txt

svn is now ignoring the .git folder completely, but now it shows the trunk folder as modified. AFAIK this is fine.

Adding the code

āžœ  honking-goose svn add trunk/*
A         trunk/LICENSE
A  (bin)  trunk/goose.mp3
A         trunk/honking-goose.js
A         trunk/honking-goose.php
A         trunk/readme.txt

Creating the new tag

āžœ  honking-goose svn cp trunk tags/1.0
A         tags/1.0

āžœ  honking-goose ls tags
1.0

āžœ  honking-goose ls tags/1.0
LICENSE           honking-goose.js  readme.txt
goose.mp3         honking-goose.php

Committing to the WordPress repository

Note: Always double check the changes you’re about to commit with svn stat or its shorter version svn st. Once you commit the changes to svn, these will be deployed to wordpress.org. You should only commit to svn when you’re fully ready to go live.

āžœ  honking-goose svn st
A  +    tags/1.0
A       tags/1.0/LICENSE
A       tags/1.0/goose.mp3
A       tags/1.0/honking-goose.js
A       tags/1.0/honking-goose.php
A       tags/1.0/readme.txt
 M      trunk
A       trunk/LICENSE
A       trunk/goose.mp3
A       trunk/honking-goose.js
A       trunk/honking-goose.php
A       trunk/readme.txt

Everything looks good to go and ready be deployed (committed in svn terms). Here’s how to:

āžœ  honking-goose svn ci -m '1.0' --username username

I got an error with the following message:

... Use your WordPress.org login
Password for 'username': ***

Adding         tags/1.0
Adding         tags/1.0/LICENSE
Adding  (bin)  tags/1.0/goose.mp3
Adding         tags/1.0/honking-goose.js
Adding         tags/1.0/honking-goose.php
Adding         tags/1.0/readme.txt
Sending        trunk
Adding         trunk/LICENSE
Adding  (bin)  trunk/goose.mp3
Adding         trunk/honking-goose.js
Adding         trunk/honking-goose.php
Adding         trunk/readme.txt
Transmitting file data ..........done
Committing transaction...
svn: E165001: Commit failed (details follow):
svn: E165001: Commit blocked by pre-commit hook (exit code 1) with output:
Please provide commit message that describes the changes you are making.

Oops. It looks like the commit message wasn’t what WordPress was expecting. If you get this error, try again with a longer commit message, such as:

āžœ  honking-goose svn ci -m 'Adding version 1.0' --username username

Success! Here’s what WordPress says about the release:

āžœ  honking-goose svn ci -m 'Adding version 1.0' --username username
Adding         tags/1.0
Adding         tags/1.0/LICENSE
Adding  (bin)  tags/1.0/goose.mp3
Adding         tags/1.0/honking-goose.js
Adding         tags/1.0/honking-goose.php
Adding         tags/1.0/readme.txt
Sending        trunk
Adding         trunk/LICENSE
Adding  (bin)  trunk/goose.mp3
Adding         trunk/honking-goose.js
Adding         trunk/honking-goose.php
Adding         trunk/readme.txt
Transmitting file data ..........done
Committing transaction...
Committed revision 2183514.

That’s it. The release is out! You can expect an email from WordPress with a diff of the changes.

PS. The next thing that I want to try is updating a WordPress plugin through GitHub actions.

Security Considerations

Always make sure to use strong credentials to guard your wordpress.org account, if this account is hacked, it’s direct access to the people using your plugin and their websites ā€” especially if they have auto-updates on.

Also remember not to include any sensible files/directories in your plugin releases: .git, .env, .sh, etc. Or any annoying ones, such as the .DS_Store.

That being said, happy code sharing! šŸ˜‰

Basic interactive video with HTML5 and vanilla JavaScript

I implemented the following interactive video using vanilla JavaScript and HTML5 with with the excuse to play with the <video> element and the HTMLMediaElement API.

The general idea of this interactive video is to play a video of introduction and present the users with options to control their experience. Click the play icon to see the demo:

Please, change your phone to landscape view!

Note: this demo is just a basic example of an interactive video. If you want a more complete example, you can read Mozillaā€™s documentation on how to create cross-browsing video players. You can also have a look at the interactive video my friend and colleague Jack Nyaga implemented for Sucuri, itā€™s pretty awesome!

Note 2: If youā€™re better at reading code than blog posts, hereā€™s the link to the GitHub gist for this demo.

Intro: Controlling HTML5 videos with JavaScript

Thanks to the <video> element introduced in HTML5, we can embed a video to a web page with as little code as this:

<video controls>
    <source src="/videos/video.mp4" type="video/mp4">
</video>

Without the use of any third-party video player!

The HTMLMediaElement API

The HTMLMediaElement API also allows us to target those elements and control them via JavaScript, which opens our world to many possibilities. Such as creating interactive videos like the one at the beginning of this post.

For example, in order to play a video using JavaScript, all you need to do is target the element and call the load() & play() functions.

var video = document.getElementsByTagName("video")[0]; // first video on the page
video.load();
video.play();

The HTMLMediaElement API has many properties and methods available for developers. I used the following list in the previous demo (some of them only while developing):

  • currentTime to get the current playback in seconds
  • duration to get the length of the video in seconds
  • ended to get information on whether the video has finished playing
  • loop to repeat a video (very useful for interactive menus)
  • playbackRate to set the rate at which a video is played (time saver for development)
  • preload to start the loading of a video (indicating it should be ready to be played)
  • load to set a video to start from the beginning and to start loading the best source
  • play to play a video

How the interactive video works

Note: The following code is a modified version of my running demo.

HTML markup

<div class="videos">
    <div class="active initial closing">
        <video autoplay="autoplay" loop>
            <source src="/path/video.mp4" type="video/mp4">
        </video>
    </div>
    <div class="category hide">
        <video>
            <source src="/videos/video-dog.mp4" type="video/mp4">
        </video>
    </div>
    <!-- More videos here -->
    <div class="play"><!-- SVG image here --></div>
    <div class="menu hide">
        <div class="menu-wrapper">
            <div class="initial hide">
                <h3>Content for first menu</h1>
            </div>
            <div class="closing hide">
                <h3>Content for last menu</h3>
            </div>
            <div class="options hide">
                <ul>
                    <li><a id="opt-1">Option 1</a></li>
                    <li><a id="opt-1">Option 2</a></li>
                    <li><a id="opt-3">Option 3</a></li>
                </ul>
            </div>
        </div>
    </div>
</div>

Thereā€™s three main sections inside the .videos container:

  1. The videos identified with the classes .initial.closing & .category. Meaning that adding new videos a ā€œcategoryā€ is as simple as using the right class on their container element.
  2. The .play container to host an svg play button (courtesy of Pixabay).
  3. The .menu container that will host as many menus as necessary. In this case I have an .initial and a .closing menu, with a shared .options container.

JavaScript code

The first thing I did was to declare the variables I was going to be using more than once.

var videosContainer = document.getElementsByClassName("videos")[0];
var menu = document.getElementsByClassName("menu")[0];
var menuOptions = menu.getElementsByClassName("options")[0];

Next I created a function to handle the loading and the playing of a given video, and an optional argument to know whether to loop the video or not. I came up with the following:

function playVideo(videoContainer, loop=false) {
    var lastVideoContainer = videosContainer.getElementsByClassName("active")[0];
    lastVideoContainer.classList.remove("active");
    lastVideoContainer.style.display = "none";

    videoContainer.style.display = "block";
    videoContainer.classList.add("active");

    var video = videoContainer.getElementsByTagName("video")[0];
    video.preload = "auto";
    video.load();
    video.play();
    video.loop = loop;

    return video;
}

Besides the loading and playing functionality of this function, is important to note its use of the .active class to identify the playing video. At the beginning of the function we retrieve the last element with said class, remove the class and then hide the element. Right after that, the function look for the videoContainer element, add the .active class to it and show it as a block element.

For my demo I also needed to play multiple videos belonging to the same category. So I created the following function:

function showVideos(index, videos) {
    if (index < (videos.length - 1)) {
        hasNextVideo = true;
    } else {
        hasNextVideo = false;
    }

    // If videos are playing, we don't need the menus
    menu.style.display = "none";

    var video = playVideo(videos[index]);

    video.addEventListener("timeupdate", function() {
        var currentTime = (this.currentTime / this.duration) * 100;

        // Helps to smooth the transition between videos
        if (hasNextVideo && currentTime > 70) {
            nextVideo = videos[index + 1];
            nextVideoTag = nextVideo.getElementsByTagName("video")[0];
            nextVideoTag.preload = "auto";
        }
    })

    video.onended = function() {
        if (hasNextVideo) {
            showVideos(index+1, videos);
        } else {
            playClosingMenu();
        }
    }
}

After this, I set a few events handlers to control the flow of the experience through the menus and the options.

Hereā€™s what I did:

var playButton = document.getElementsByClassName("play")[0];
playButton.onclick = function() {
    playButton.style.display = "none";
    playInitialMenu();
}

var option1 = document.getElementById("option-1");
option1Link.onclick = function() {
    showVideos(0, videosContainer.getElementsByClassName("category-opt-1"));
}

// handlers for more options here...

function playInitialMenu() {
    playVideo(videosContainer.getElementsByClassName("initial")[0], loop=true);

    setTimeout (function () {
        menu.style.display = "block";
        menu.getElementsByClassName("initial")[0].style.display = "block";
        menuOptions.style.display = "block";
    }, 1000);
};

Thereā€™s also a playClosingMenu() which is almost exactly as the playInitialMenu(), with the difference that the playClosingMenu() function hides the initial menu and displays the closing menu.

And thatā€™s all the code necessary for this demoā€¦ Plus a few lines of CSS which Iā€™m not going to address here because I think it goes out of the scope. However, all the code is available on this GitHub gist.

Note: I took some inspiration from this blog post on Sitepoint.

Thanks for reading! Iā€™m on Twitter in case you want to chat!

The security configuration of my static blog

Even though Iā€™m using Hugo to generate the source code of my blog, I decided to host it on a self-managed VPS. You could say this is a lot of overkill for a static site that can be hosted on any platform, and you will be right. But being in charge of my own turf gives me more control over the security settings than what I could have on a shared hosting.

The breaking point for me is that setting up, deploying, and maintaining web servers is always fun!

Setting up expectations

With this blogā€™s current security configuration Iā€™m trying to:

  • Protect my blog from targeted/opportunistic attacks.
  • Detect security issues/incidents at an early stage.
  • Be ready to respond to successful security incidents.

Every piece of software on my server, or service around my website contributes to those goals.

Iā€™m aware that thereā€™s nothing 100% secure. In fact, affirming that a product/service/server is unhackable will likely raise the same reactions in the infosec community than questioning the speed of light in a room full of physicists.

However, if you want to have an online presence, you need to go as far as you can to protect your visitors, as this is the ultimate goal.

Protecting my web server

Iā€™m using Ubuntu 18 as the OS of my web server. In my opinion, when it comes to security, new is always better.

Users, sessions & privileges

In a *nix system, the root user has the highest set of privileges. This user can run # rm -rf / and get away with it. The sudoers are users with privileges to perform actions outside their role.

If an attacker logs in to the server as a root user or a sudoer with enough privileges to modify the serverā€™s configuration or the source code of my blog, things are going to get messy. Thatā€™s why protecting how these users log in, and what they can do once logged in is important.

Hereā€™s what I did:

  • Created sudoers with specific privileges, according to the Principle of Least Privilege.
  • Installed SSH keys for the sudoers, and protected the keys with long, complex and unique passphrases.
  • Disabled SSH connections on port 22, and set a custom one.
  • In my /etc/ssh/sshd_config file I:
    • Set PermitRootLogin to no to block the root user from log in to the server.
    • Set PasswordAuthenticationChallengeResponseAuthenticationPermitEmptyPasswords and UsePAM to no, disabling log in to the server with a password, for all users.

These settings will complicate an attackerā€™s attempt to brute force his/her way to my server.

Web server: Nginx

I wanted to dedicate some time to my web server because it is what interacts with my visitors. My default choice is Nginx and I always follow OWASPā€™s hardening recommendations to configure it for security.

To summarise, these recommendations help me configure Nginx to:

  • Avoid buffer overflow attacks
  • Mitigate slow DoS attacks
  • Restrict access to specific domain names and IP addresses
  • Configure ssl/tls
  • Limit http methods and set http secure headers
  • Avoid unnecessary display of data and to delete unnecessary files

And in addition to OWASPā€™s security recommendations, I also configured Nginx to:

  • Only accept requests to https://mostlydevstuff.com and 301 redirect other addresses to this one.
  • Donā€™t serve any content when reaching out to the serverā€™s IP address.

Server-side firewall: UFW

I personally love security solutions that require a lower learning curve and that are quickly to deploy. So when it comes to firewalls, I think UFW live up to its name: uncomplicated firewall. And thatā€™s why I chose it.

My requirements for UFW were simple:

  • Block all by default
  • Allow requests from specific IP addresses (the WAFā€™s IP addresses)
  • Only allow https requests
  • Block ssh connections on port 22
  • Allow ssh connections on custom port

Some of this settings are redundant as per my Nginxā€™s configuration but think of this as a lettuce. Itā€™s a layer on top of a layer on top of another layer.

Web application firewall (WAF/CDN)

I use Sucuriā€™s website security platform which includes a WAF/CDN. Why? Because even though my website is completely static, the backend still needs protection. My operating system and all of the software installed on it, including Nginx, could contain software vulnerabilities or misconfigurations.

Deploying a web application firewall allows me to protect my website from the attack vectors I wasnā€™t able to foresee.

There are other benefits of using a WAF. Iā€™ll name the two most important to me.

Pain free migrations

Even though my website is static at the time of writing this post, it doesnā€™t mean itā€™ll stay that way.

WAFs are deployed through DNS changes, for this reason, they are great to deal with all sorts of migrations.

For example, if I want to move this blog to a CMS, all Iā€™d have to do is set up a new server and point the WAF to the new IP address.

PS. I migrated to WordPress.

CDN

Serving my blogā€™s assets through a WAF/CDN will also help me improve the load time of my site, as a consequence of serving my content from servers closest to the location of my visitors.

And many other benefits that could fit on their own post.

SSL certificate

Even though SSL certificates do nothing to protect a website from the attack of cyber-criminals, theyā€™re still a website security best practice.

Hereā€™s why SSL is important for my blog:

  • SSL certificates validate domain names: meaning that when my visitors see mostlydevstuff.com on their browserā€™s address bar, they can be certain they are in the right place.
  • SSL certificates encrypt data in transit: which means that what youā€™re reading wasnā€™t read/modified by a third party while the data was in transit (man-in-the-middle attack).
  • Mixed content warnings: Browsers will panic if a website using an SSL certificate tries to load an asset over http. Why is this important? These mixed content warnings can signal attackers linking http assets from https websites (poor executed attacks).

Website monitoring

Despite all my efforts to secure this blog, things can still go south for many reasons. One of the best precautions I can take is to set a website monitoring service, such as the one Sucuri has, as part of its website security platform.

This monitoring service will verify the integrity of files and will load my website frequently using different IP addresses and user-agents to try to discover conditional malware or any other sign of compromise on my blog.

Hereā€™s what I monitor for:

  • Source code changes: A server-side scanner will verify if there are changes in the source code of my website every 24 hours.
  • Malware & blacklists: An external scanner will verify if my website is serving malicious pop-ups/pop-unders, hosting malware or if itā€™s in any major blacklist every 30 minutes.
  • DNS changes: To verify any change on the DNS for the domain mostlydevstuff.com. If attackers break into my configuration panel and change the DNS for this domain, I will know within 30 minutes.
  • SSL changes: Because you canā€™t never be too precautiousā€¦ I look for any change in my SSL certificate every 30 minutes.
  • Uptime: If my blogā€™s server goes down for any reason, Iā€™ll be notified within 5 minutes.

Response plan

My friend and colleague Val Vesa recently published a great blog post about creating a response plan you can trust. In my case, if the worst happens and my server is compromised, I have a couple of options.

  • Just like in real life, I travel light. I can always destroy this server, create a new one and deploy my blog again. Making sure to understand how the compromise happened in order to block it in the future of course! This is an option because Iā€™m a technical person and I know my way around terminals and configuration and log files.
  • Submit a ticket to the response team at Sucuri so they can figure it out for me.

What am I lacking?

Automatic server deployments

At the time of writing this blog post I donā€™t have an automatic server deployment process and this need to change. Gio Delgado posted an amazing blog post talking about his over-engineer blog setup on dev.to. Iā€™ll give it a few reads to take on inspiration!

An important note

This blog post doesnā€™t get to have a conclusion because securing online assets is a never ending process. Expect this to be a living blog post, updated regularly.

I hope you enjoyed the reading time!

Did you find a bug in my blog? Do you have any question about my security configuration? Do you want to share a gif or a meme? Iā€™m on Twitter!

My motivations to start blogging

I must confess it took me a while to put this blog together. And I donā€™t mean the frontend or the backend. That was the easy part. I mean accepting and embracing the inevitable consequences of sharing identifiable information online. But I will expand on that in a future post.

My motivations to start blogging are the following:

  • To get more visibility on my career in tech.
  • To create a space where to share side projects.
  • To put myself out there.
  • To accomplish one of my IDP goals at Sucuri/GoDaddy (I set this for 2018).
  • To share pictures of my dog.

My main goal is to open source my day to day learning about development of web services and their securityonline securitymarketing and technical writing.

This is a huge side project!

To make it work I plan to share a small piece of content every month.

I want to give a special shout out to Alycia Mitchell. my manager at Sucuri/GoDaddy, for keeping her door/chat always open to discuss MBO/IDP goals with the same priority (this says a lot about a manager!). And also for being the one who came up with the domain name mostlydevstuff.com based on my really vague description.

This is the very first entry in my blog, thank you for being here!

If you want to reach out, Iā€™m on Twitter.